Friday, June 17, 2011

calling all francophiles

Well, I am true to my word. I did post today.
But my tutorial is coming tomorrow. Because I attempted to sew and my sewing machine is made of pure evil. It ate my bobbin, guys. And then refused to work. True, I am inept with sewing machines. But still.
So, because I am an ambitious person who wanted to do something besides t-shirts, I'm currently sewing a skirt by hand. This skirt will not be machine washable unless you have a working machine, in which case I envy you greatly. 
Moving on.
I don't know why but I'm obsessed with French style right now. The black and white stripes, pleated midi skirts, pops of red and all around effortless chicness are really inspiring. (Paris, here I come!). Here are some inspiration photos--been a while since we had a good drool session.

via What I Wore--whatiwore.tumblr.com

Pleated skirts will never go out of style, and they're so soft and romantic! I'm officially obsessed.

via What I Wore again-that girl is so stylish and talented! She makes a lot of her own dresses.


I am loving the black and white stripes with a pop of red combo right now. More examples below:
via Kendi Everyday--the blog I read when I'm stressed out or need inspiration. Keep being stylish! :)
 Oh-so-effortless yet pulled-together is another thing I like about French style.
via Kendi Everyday
 Here's another example of black, white, and red all over. I also love the glasses with this outfit--to all you gorgeously glassed gals, put away your contacts and rock a pair of chic frames! They look great with everything and add instant pop. (Jane, Carly....this means you!)
Kendi Everyday again

Anyone else a francophile around here, or is it just me?

(Oh, and if anybody French is reading this....let's trade closets :)
<3 Maggie


Thursday, June 16, 2011

(re)design your summer week: big brother

Hey guys! Whew, it's been a while.
So let's get down to business (to defeat the Huns....). I had this tunic lying around that had seen better days as a dress but since I'd grown now barely covered the dark side of the moon. It was sad, wrinkled, and cowered in the bottom of my drawer. So I took it out and swore "Shirt, I will make a man out of you." But not a manly man. More of a feminine man or perhaps a cross-dresser.
I'm getting off topic. Moving on.
This shirt is kind of the big brother of this shirt. Or the big sister. It does have flowers on it, you know. Again with the cross-dresser manly aspect of it.


I took this picture when I was bored. Hope you like it. Should I audition for America's Next Top Model, or would that be too cruel to the other models? I like a challenge, ya know.


The tunic in all its glory. Its a good beach coverup but....during the first wash colors bled in very unfortunate places under ze armpits. This was 2 years ago and it's been worn once.
I don't know if I can do a proper tutorial for this; it's basically the exact same thing as Shoulder Chic from Generation T. So if you want to learn the method, buy the book. It's worth the money, believe me. (No, I'm not getting paid for this! Why would you think that? Seriously, I'm not though. It's just an awesome book :D)
 This is how my tunic came out afterwards!


 Apologies for the blurry photos....it doesn't look it, but it's nighttime out there!
 I'm now officially ready for some fun in the sun!!
<3 Maggie


Wednesday, June 15, 2011

(re)design your summer week: tees in tatters

Hey, everyone! Miss me?
Our project for today will involve another t-shirt (I'll do something without them! I swear!). As always, I was searching for inspiration the other day with Jane and Carly when I stumbled upon the most perfect tank top. It came with a less-than-perfect price tag, however, and I knew I could make it myself.
Pretty? Very. Worth $78? Naah.
 So without further ado, here's how to make your very own!

Before: Yet another tie-dyed victim of the third grade.

Close-up!
 Things you'll need:
-an old t-shirt (L or XL at least--the bigger the shirt the longer and more fabulous the fringe)
-a good pair of scissors (I use dressmakers scissors, but regular ones work too--just make sure they're sharp!)

That's it! No bleaching, sewing, or even hot-glue-gunning.

1. Lay the shirt flat and cut out the sleeves and neck band just behind the seams.
2. Cut the neckline into a generously sized oval. Thin the straps so they're about the width of 3 fingers.
3. Cut down the sides, from armhole to hem.
4. Cut thin, small strips (about the width of a pinky) all the way down the side of your shirt.

Close-up of the strips
 5. Tie the strips together and tug on the tied ends a little. This will make the fabric curl up and become thinner and longer.
I snapped this picture halfway through, when I tried it on. You can vary the tightness of the shirt depending on how deep into the fabric you cut your strips. Oh, and excuse the boxers. Today was a pajama day.
 6. Do the same to the other side.


Random kitty picture. Sorry, I had to. What else is a gal to do while her fluffy kitten is sleeping beside her as she works?

 7. Put on and admire. Strut it like you mean it.


 This started out as a copycat of the free people top, but it kind of turned into my own thing along the way. I like both versions but since mine was $78 less, I'll stick to it! (and that's $5 a use of this tutorial. Kidding!)
Wear this to a concert, to the beach, or to your father's corporate party if you want to be really edgy and shocking.
<3 Maggie

Tuesday, June 14, 2011

(re)design your summer week: fun with batik

Posting three days in a row! Wow, I must be getting the hang of this blogging thing.
Self-congratulations aside, I've been thinking, you know, it's high time we had something extra-special going on over here besides the impromptu photoshoots (you know you love 'em). I then looked in my closet and discovered something.
The majority of the clothes I own don't fit, have sentimental value or are family heirlooms, or are kind of strange (like the pioneer dress). And to disguise this problem I'd been buying newer, cuter stuff that floated over the rejects like whipped cream on cow manure (ok, ok, exaggeration there but I couldn't resist). In the end I simply didn't have very many clothes I wanted to wear and had exhausted my parents' shopping goodwill.
So, (re)design your summer week was born! Every day I'll be posting my own tutorial on how to revamp old clothes using things pretty much everyone has around the house (my sewing machine is STILL on the fritz so there probably won't even be many sewing things....single tear....). If I stick to my plans and post every day and people don't get tired of me posting every day, this may even become a month! (that is....if I have enough clothes for a month.....). So let's get started!
Today, I'm going to be using an extremely tricky technique called Splattering Things with Bleach. No, really.
One of this season's emerging trends is ikat print, which cultures all over the world (most famously Central and South America) used on garments. Fashionistas starting as early as European colonizers saw, liked, and took. Now this ancient design is appearing on modern skirts, dresses, tops, bikinis and pillows everywhere. Here are some examples:
Ikat skirt as seen on Kendi Everyday.

Image courtesy of J.Crew

J.Crew ikat print shorts

J.Crew tank top (what can I say? J.Crew has good stuff!

A while ago for a school project I taught my class how to artistically attack napkins with bleach pens to create a batik-like look, so as you can imagine I had a lot of bleach pens left over afterward. If you don't have a bleach pen many supermarkets carry them (Clorox works best for me because it has a thick tip and a fine tip, which we will be using). Stain remover is not the same thing. If you try to use stain remover for this it will not work out very well. Anyway, when I saw these gorgeous patterns I was inspired to create my own. This is not how ikat OR batik was culturally produced but it mimics the style of both.
 Things You Will Need:
-a bleach pen (or two....depending on the intricacy of the design and how much space you want to cover. I was fine with one for my t-shirt)
-Gloves, so if you're slightly klutzy like me you don't get bleach all over your hands
-a paper towel
-an old t-shirt or anything else you'd like to give a makeover to. This technique works best on fabric that's 100% cotton or close to that. 
-chalk or dressmaker's chalk for drawing your design
-a design guide or inspiration photo unless you know how to freestyle-design ikat print
-wax paper/cardboard
-outdoor space or a well-aired room unless you love the smell of bleach
-sink/tub and faucet for handwashing
-clothesline or chair to drape your wet, drippy creation all over
-a flat workspace like a table or desk that can get accidental drops of bleach on it and nobody will freak out
 This may look like a long list of things but I'm willing to bet you probably have many of these items already. You should probably assemble what you need beforehand so you don't have to run all over the house looking for stuff. *not that I did that or anything*
1. Lay your shirt flat on your workspace and slide a piece of wax paper or cardboard inside it. This will prevent the bleach from bleeding through to the other side.
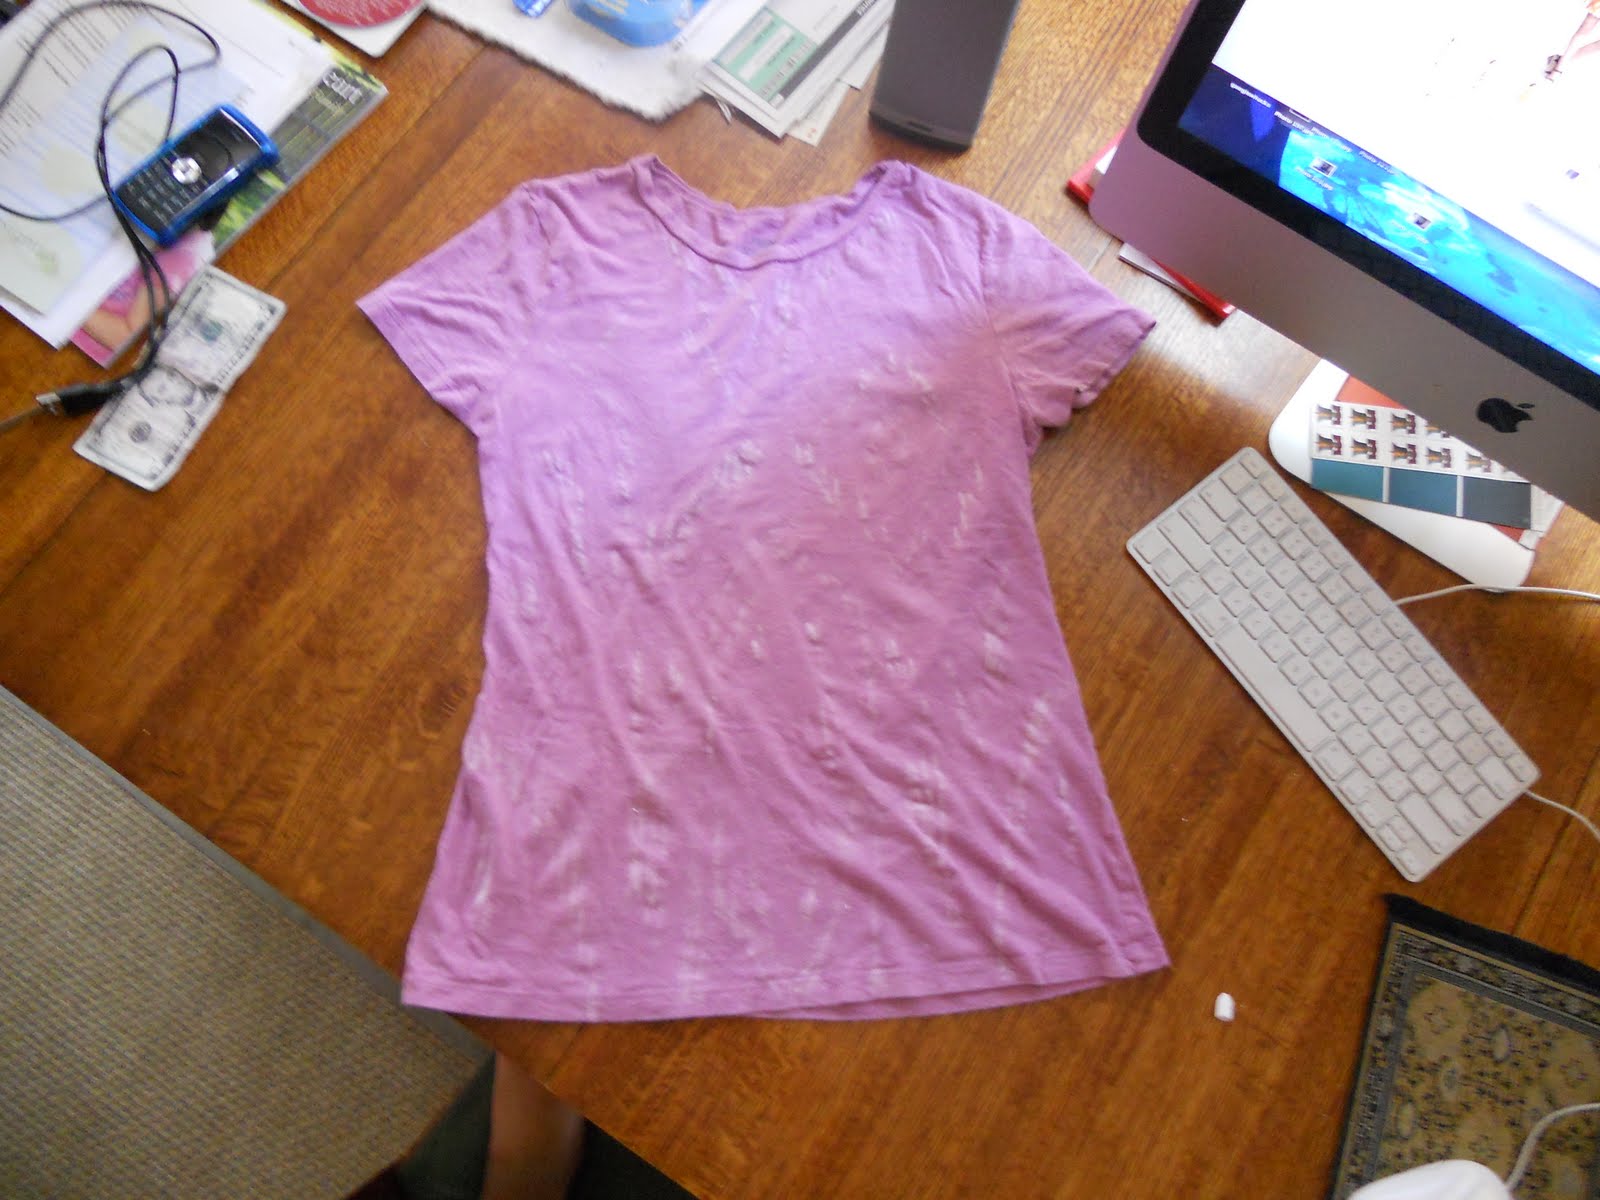
before: a plain, well-loved purple t-shirt. Did you know that different color shirts bleach to different colors? Blue bleaches to beige-y, red bleaches to light pink, and coolest of all green bleaches to tan.

2. Draw with chalk the ikat design you want to copy. If you mess up, its ok; the chalk will come out in the wash. Choose a design that's widely spaced and not too intricate because the bleach spreads and turns anything complicated into a messy blobby blob. I chose a simple print that I copied from the J.Crew dress/shorts pictured above.


 3.  Give the bottle a test squeeze onto the paper towel to make sure the bleach is flowing right. Using the fine tip of the bleach pen, carefully trace your design with bleach. You don't need much; the bleach will spread. You can vary the thickness of the line by squeezing out more bleach. Use the pen to drag existing bleach along the chalk to make lines thinner.


 4. Once you're done tracing your design, let the bleach dry. This can take anywhere from 10 minutes to a couple hours, depending on how much bleach you put on.

lalala bleach is dry now!
 5. As you can see, the bleach spread quite a bit. Now fill the tub or sink with a few inches of cold water, you don't need much to rinse the shirt off in. Don't use any soap. Dunk the shirt in and use hands to get off the dried bleach. You don't have to use your gloves for this.

 6. When you're finished, dump out the water, give the shirt a squeeze to get the excess water out, and hang on your clothesline/handy porch chair to dry!

Design close-up. I think it turned into batik somewhere along the way. 
As of now, mine is still drying....I'll update this post with a pic of me wearing it when it's dry. But the seventh step is to put on your new(kinda) shirt and enjoy :) After your initial washing, you can machine wash and dry this shirt! (that is unless you're one of those people who have to dry clean your t-shirts....in which case I don't recommend this project).

<3 Maggie

Monday, June 13, 2011

you know what's fun?

Modeling. Modeling is fun.
No, not like that. That doesn't look fun at all. You have to be wearing pretty clothes, duh.

You can buy our fabulous outfits at Carly'sCloset boutique if you call in the next 0.1 seconds. Too late! You slow. :P

 Left, in the "geniunely crazy person" outfit is Jane. Pictured middle is CB, my gorgeous model in the "crazed USC fan" look and to the right is yours truly modeling the "season confused Hawaiian tourist" style.

Now, children. Let me tell you a story:
Once upon my friend Jane decided that her mission in life was to be the real slim shady.

She first had to find all the other so-called 'slim shady's' so she could kill them and claim her rightful title. So she was all
May I have your attention please?
Will the real Slim Shady please stand up?
I repeat, will the real Slim Shady please stand up?
We're gonna have a problem here..


 I stood up.
That was my big mistake. For Jane was thinking, "aha. So this is my big competition. A Hawaiian tourist dressed for skiing." And I was thinking "I didn't know Eminem was an insane gender-confused cosplayer!"
 That's when a crazed USC fan dashed into the stadium screaming and waving its arms. "Gooooo.....OCTOPUSES!" it yelled, doing jumping jacks.
"The team mascot isn't the octopus...." I pointed out.
"I know. I just like octopuses," the fan argued. That's when we all gave up being slim shady and made kissy faces at the camera.
Gimme a kiss, hun!
 Unfortunately the on-camera romance fest blossomed into something deeper. The crazed fan had fallen in love with Eminem, who would have none of it.

Looks like there's only one bottle of beer on the wall now.

 The fan was heartbroken, so to cheer it up I suggested we build a human tower. "Great idea, Maggie!" everyone cheered. Since the pyramid was a little out of our reach we did the "centipede doing a handstand."


OM NOM NOM


 Then, the fan heard there was a USC game on and rushed off to see it. Unfortunately the fan wasn't allowed through the gates so it sat on the security guards and farted until they surrendered.

Never underestimate the power of beans.

This is us, slightly drunk off of the fan's farts, which had a similar effect as laughing gas or perhaps dancing turtles.
 Then Jane remembered she was supposed to be slim shady and stabbed me. The fan was horrified at what she'd done.


 It was only through the magical cure of chocolate dipped bananas and threats of everlasting bunions that I came back to life. My hat was missing but the angels had given me a cupcake during my short stay with them, so I wore that instead. They also gave me starbucks coffee, because starbucks is heaven.

What is it with me and wearing cupcakes on my head?!


We all eventually forgave Jane for her past misdeeds and took the vow of silence. We became monks and everything. That is, until I realized I wasn't allowed to refashion the monks' robes.

And that, kids, is why you should host fashion shows using the bounty of a friend's closet. 
<3 Maggie

Sunday, June 12, 2011

travel the world

Hey guys! sorry for the minor hiatus-I was on an adventure trip in COSTA RICA!!!!! *superhappywoot* it was amazing :D. But more on that later.
The last few posts have been inspiration, random things and cupcakes which is very nice but this is supposed to be a diy blog here, right? So I came up with a solution: The Box of Old T-Shirts.
After an archaeological dig I discovered the World Strides t-shirt I was sent because I signed up for the Costa Rica trip. It had a very pretty design that I was eager to keep so I ran straight to Generation T.
I used the Shoulder Chic project, and here is the result! (it's more of a tunic and a very comfy plane outfit):
Before (and assembled materials--the toes sneaking into the picture are very important. Don't forget your toes)


design close-up!


After! As you can see, the mirror is dirty. Also hopefully as you can see the shirt turned into more of a tunic but I like it that way and it's super comfy!
Blurry and fuzzy but you guys can hopefully see what I did to the neckline....:)


Allow me to distract you with a picture of my cat.
 happy summer!!!!!
<3 maggie